If you’ve been using Terraform for a while, you probably think of it as a tool to provision new infrastructure. That’s true, but it’s also capable of managing existing resources that were created outside of Terraform.
This is where the import block comes in. With it, you can pull existing resources into Terraform’s state so you can manage them as if Terraform had created them from day one.
In this guide, I’ll walk you through:
- Defining a Terraform resource block for an existing AWS VPC
- Using the
importblock to bring that VPC into Terraform state - (Optional) Using
generate-config-outto auto-generate Terraform configuration - Verifying Terraform is now managing your resource
Why Import Resources?
Adopting Terraform doesn’t mean always starting from scratch. If you already have a production VPC, subnets, route tables, or other infrastructure running, you can still gain all the benefits of Infrastructure as Code:
- Unified management – Keep all infrastructure in a single Terraform configuration.
- Version control – Track every change in Git.
- Consistency – Enforce configuration standards without recreating resources.
Step 1: Write the Resource Block
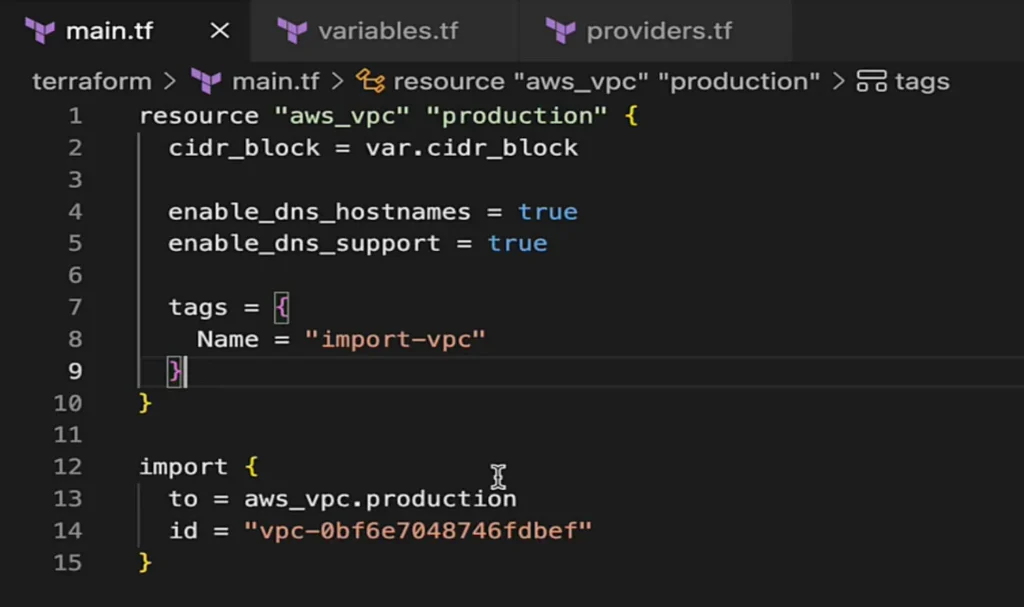
Before Terraform can import an existing resource, it needs to know what it’s importing. That means creating a matching resource block.
resource "aws_vpc" "production" {
  cidr_block           = var.cidr_block
  enable_dns_hostnames = true
  enable_dns_support   = true

  tags = {
    Name = "import-vpc"
  }
}
Tip:
- Your configuration should mirror the existing resource’s settings as closely as possible.
- You can use variables to avoid hardcoding values like
cidr_block.
Step 2: Add the Import Block
The import block tells Terraform:
- The Terraform resource block will manage the resource.
- Theexisting resource to import.
import {
  to = aws_vpc.production
  id = "vpc-1234abcd"
}
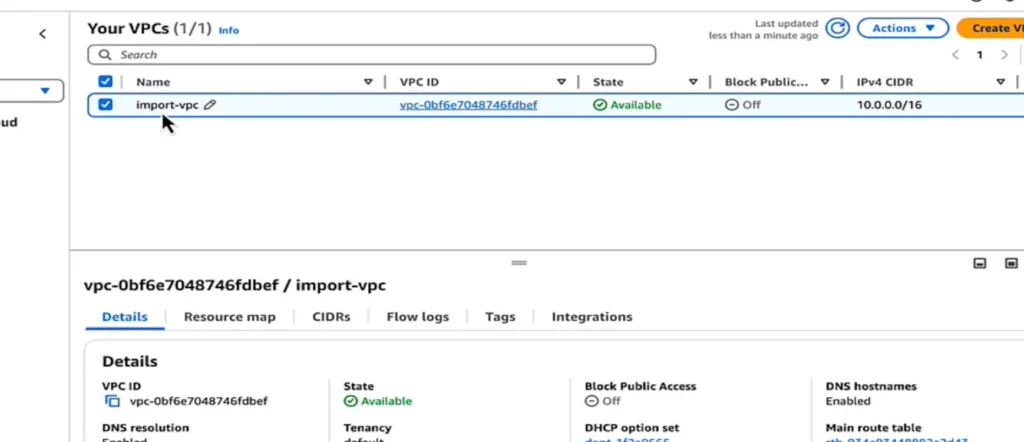
to= the Terraform resource name (aws_vpc.productionin this example).id= the AWS VPC ID from the AWS Console.
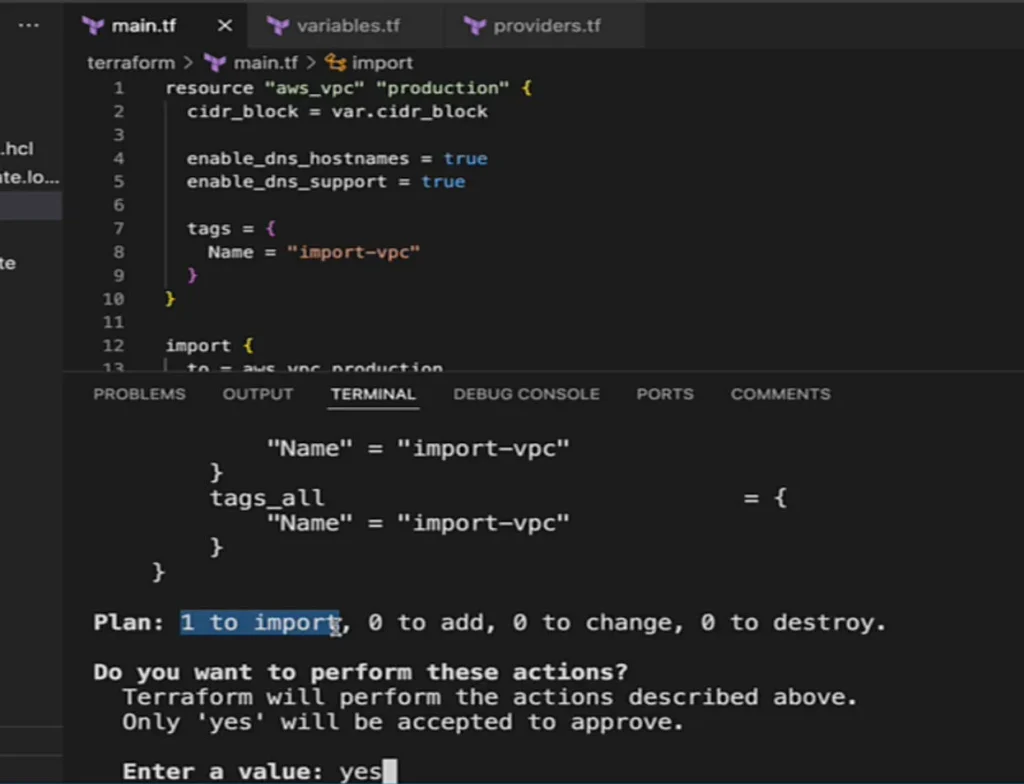
Step 3: Initialize, Validate, and Import
Once your resource and import blocks are ready, run:
$ terraform init
$ terraform validate
$ terraform apply
Terraform will:
- Connect to AWS (using your configured credentials).
- Find the VPC with the given ID.
- Add it to your Terraform state.
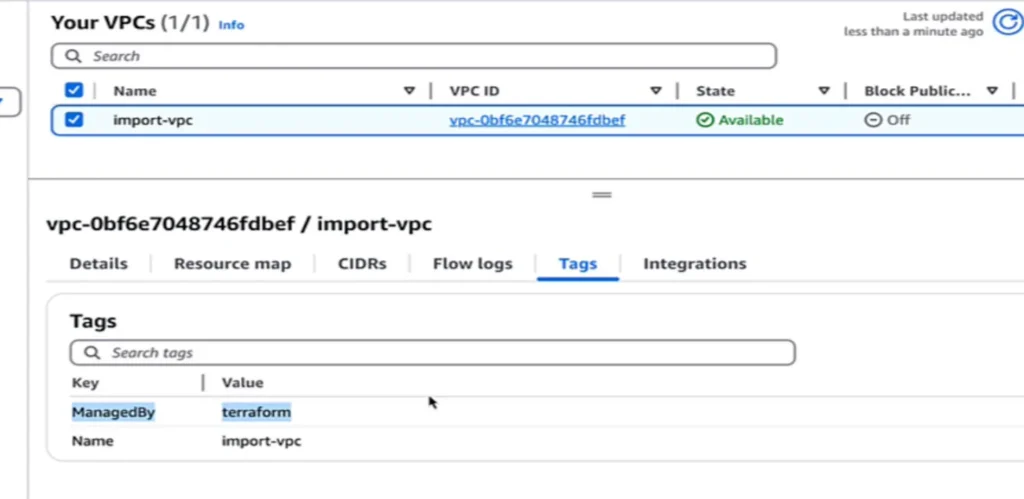
Step 4: Remove the Import Block & Prove It Works
After the resource is imported, you no longer need the import block so you can remove or just comment it out.
To verify Terraform control, modify your resource block. For example, add a ManagedBy tag:
tags = {
  Name      = "import-vpc"
  ManagedBy = "Terraform"
}
Run:
$ terraform apply
In the AWS Console, the new tag should appear, which is proof that Terraform is managing the resource.
Step 5 (Optional): Auto-Generate Config with generate-config-out
For more complex resources, Terraform can generate the configuration for you:
$ terraform plan -generate-config-out=subnet.tf
This creates a .tf file containing the resource block for the existing resource. You can then:
- Move it into your main
.tffiles. - Review and remove unnecessary defaults (Terraform often includes arguments you don’t need).
This feature is still marked as experimental, but it’s a huge time-saver.
Best Practices for Terraform Imports
- Match existing settings to avoid configuration drift.
- Clean up the generated files from
generate-config-out– remove unnecessary arguments. - Consider
for_eachfor bulk imports – useful for importing multiple subnets or route tables at once.
Benefits & Drawbacks of Import Blocks (vs. terraform import)
Using the import command can give you benefits such as:
- Plan-first, reviewable workflow –> With import blocks, you preview the import in
terraform planand only write to state onapplywhich is perfect for PR review and change control. You don’t get the same validation usingterraform import - Auto-generate starter HCL –> You can auto-generate starter HCL (as mentioned above)
- Clear provider/alias targeting in code –> Clear provider/alias targeting right in your IDE vs. CLI
- Ideal for pipelines –> putting import in files is ideal for pipelines managing your Terraform
Gotchas to keep in mind:
- Terraform version matters. Config-driven import requires Terraform v1.5+.
- Generated HCL is a starting point. You’ll still review and trim what
-generate-config-outproduces. - Provider/resource support varies. A resource must support import and use the correct ID format; otherwise, the operation will fail (same limitation applies to the CLI).
Quick contrast: the terraform import CLI is fine for one-off fixes, but it writes to state immediately, is less CI/CD-friendly, and imports one resource at a time (no bulk semantics), making it harder to review and automate at scale.
Key Takeaways for Terraform Import BlocksFinal Thoughts
The Terraform import block makes it possible to:
- Transition existing resources to Infrastructure as Code.
- Avoid downtime while gaining Terraform’s consistency, version control, and automation benefits.
- Scale easily by importing multiple resources or even entire environments.
If you’re moving from manual management to Terraform, importing is one of the most valuable steps you can take to get all your infrastructure under one management tool without starting from scratch.
Explore my latest courses